Note: The full Tokens feature will need to be added to your Intuto site to access some of the features below, please contact us at support@intuto.com to start using the full Tokens feature.
The Token Manager
Click Tokens in the top right of your screen to access the Token Manager.
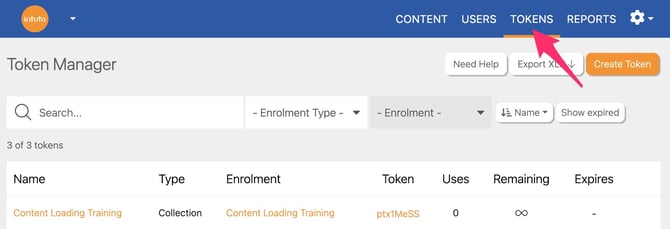
Here you'll see a list of all the active tokens on your site.
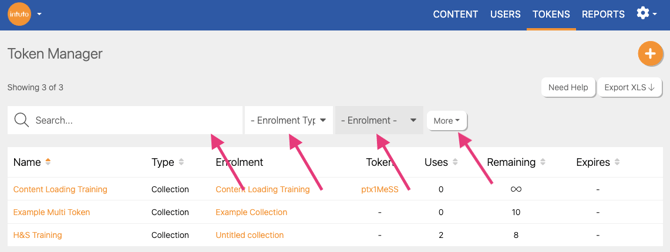
You can search for a token name with the Search bar at the top of the page, or you can filter your tokens by Enrolment type (Collection or Group) and then by specific Collection name or Group name in the Enrolment dropdown.
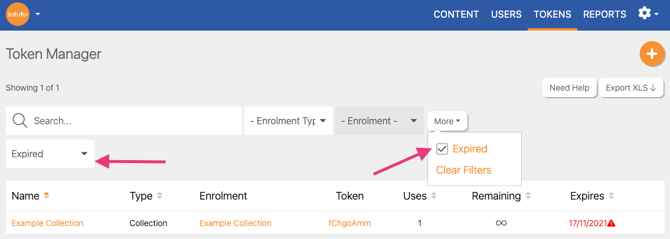
If you have any tokens that have expired, they will move to the expired tokens list, which can be accessed by clicking More at the top of the page and then ticking the Expired option.
Change the dropdown from Active to Expired to see your expired tokens. Change it to Active to go back to your active tokens list.
To manage your tokens you can:
Creating a Token
If you do not have the full Tokens feature, you can create a simple token from within the collection or group editor. You can learn more about how to create tokens in the collection editor here and in the group editor here.
If you have the full Tokens feature, you can create a simple token from within the collection editor or group editor as well as a token with an expiry/usage limit from the Tokens page. To create a token with an expiry/Usage limit you first need to publish the collection or create the group you want the token to provide users access to. You can learn more about creating collections here and creating groups here.
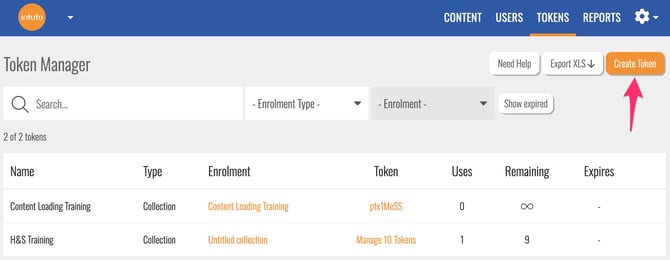
Once a collection is published or a group created, go to your Token Manager page by clicking Tokens in the top right of your screen.
To create a token, click Create Token.
You'll see the following pop up:
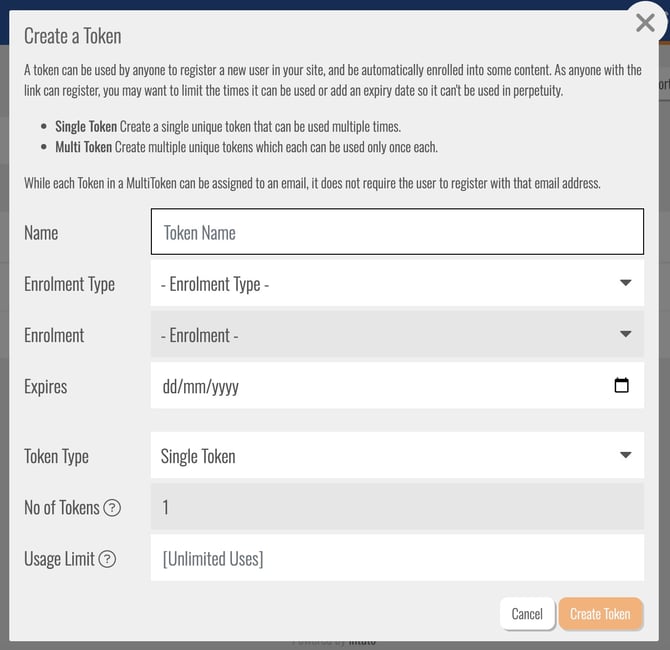
Name: Choose a name for your token. This is a free text field so you can name it based on the collection, the intake, or whatever makes the most sense for your use case.
Enrolment Type: Choose whether your Token will add users to a Collection or Group.
Enrolment: Once you have selected the Enrollment Type you'll be able to select the specific Collection or Group you want the Token to enrol into.
Expires: Select a date for your tokens to expire, once this date has passed, the tokens will no longer be valid. If you leave this blank there will be no expiry date.
Token Type: Select either Single Token or Multi Token. You can read about the different token types here.
Usage Limit/No of Tokens: You can select how many times you want the token to be used (Single Token) or select the number of tokens to create (Multi Token).
Once you are happy with your chosen settings, click Create Token to confirm your settings and create the tokens on your site. You'll see the token appear on your Token Manager page.
Editing a Token
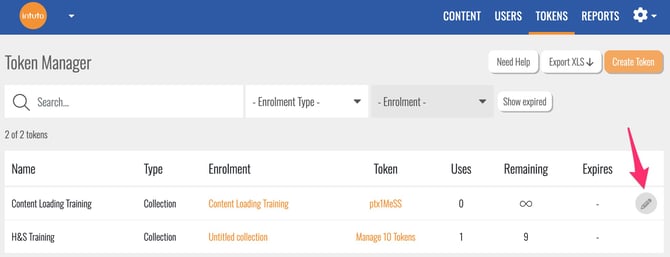
When you have created a token, you'll see it listed on the Token Manager page.
If you want to edit a token, you can do so by clicking the pencil icon on the right hand side of the Token Manager page.
You'll see two options: Edit or Delete. Click Edit to make changes to your token, or click Delete to delete it.

When editing single or multi tokens, you will only be able to update the name and expiry date. The Enrolment Type, Enrolment, Token type, Number of Tokens and/or Usage Limit is all fixed as these settings may affect existing enrolments/group additions.

If you want to stop a token from being used, you can change the expiry date to yesterday's date. This will also move the token to the expired tokens page. Click Show expired to see a list of your expired tokens.
Expired tokens can be edited by following the same process above.
Sharing a Token
Once you have created a token, you can share it with your users.
Single Tokens
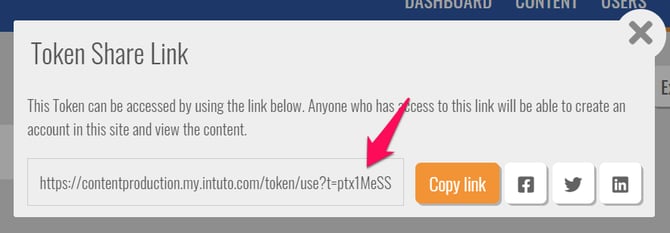
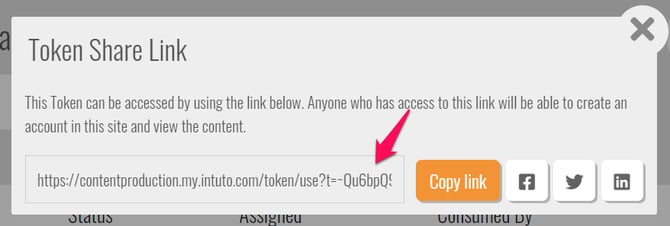
A single token is one link/URL that can be shared with your users. To find the token link, click the code in the Token column of your Token Manager page.

You'll see a pop up containing a link - this is the link to share with your users.
As the token is used, you'll start seeing the number increase in the Uses column, and if you have set a usage limit, you'll see the number in the Remaining column decrease.

Multi Tokens
A multi token creates a list of unique links/URLs that can be shared with your users. To find the Token links, click the token name in the Name column.

You'll then be taken to a page containing a list of the unique codes.
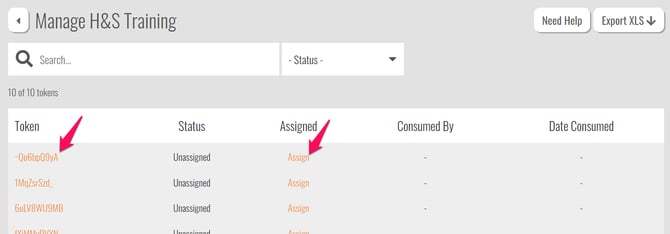
Click the code in the Token column to access the link/URL to send to a user.
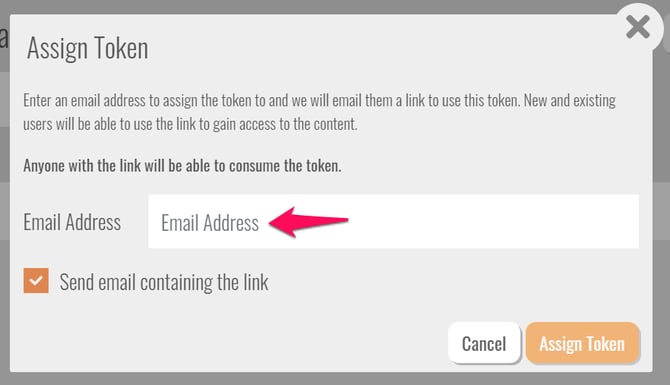
Alternatively, you can click Assign to enter an email address for the link/URL to be sent to.
When you assign a token to a user, their email address will appear in the Assigned column. If the token has been assigned incorrectly, click the x to clear the email address. You'll then be able to assign a new email address.

When a multi token has been used, you'll see the name of the user as well as the date they used the token appear in the Multi Token page. Click the name of the user to go to their user report.

Once a multi token has been consumed, it cannot be reset.
Tokens and Integrations
Tokens can be used with some integrations to automate the enrollment process when dealing with bulk orders. Please contact us to learn more about integration options for your site.
Please contact us at support@intuto.com to discuss your token options.